
Checkout API
The checkout is Wapping’s flagship feature, designed to integrate seamlessly and deliver a smooth, unified buying experience for customers
The following scheme shows the flow of the checkout API integration, the only one mandatory API you need to use to integrate Wapping with your POS software or even with your bespoke ecommerce plataform.
With this integration the customer checkouts are informed to the API, and the aplicable benefits are informed back. The basic steps are:
- Identify the customer that is transactioning
- Specify the checkout contents, the products the customer is buying
- Obtain all the benefits that could apply to this checkout, that means ALL of the benefits calculated by the complex logic server side in Wapping, and informed to the checkout in a simple way.
- Confirm the operation, in order to persist the changes and release the benefits earned by it.
- Upload the digital receipt (if digitalized, if not it can be digitalized by the platform), so the customer has it in their wallet.
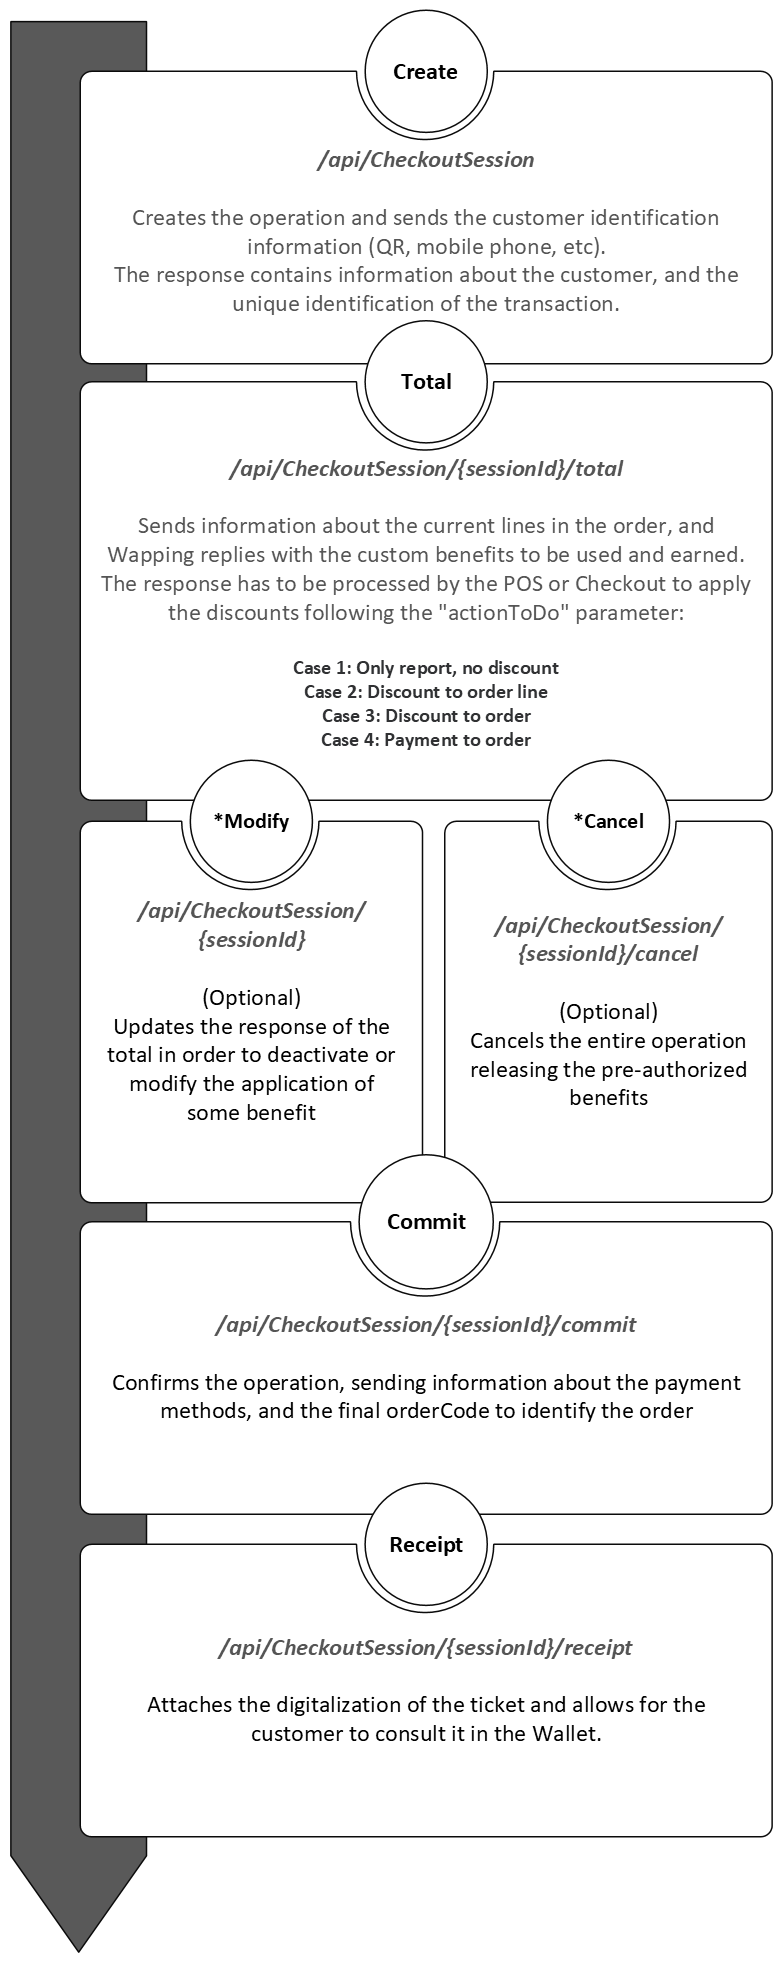
Scheme of Checkout API calls
Modify and cancel are optional steps that allow to either modify the response from wapping (if applicable) in order to disable some of the benefits that are informed to be applied, or to cancel the session altogether.
Note that for ecommerce most prominent platforms (Salesforce, Shopify, Prestashop, VTEX, Adobe Commerce) Wapping provides the cartridge/module/plugin avoiding IT team to build the integration, and only a simple setup and connection is needed. Refer to the Ecommerce documentation if needed
Next steps would be to deep dive into the Checkout Basics to understand fully the basic steps of Create, Total and Commit.
Updated 11 months ago