
Getting Started
This section defines the steps and tasks required for a successfull onboarding, meaning all the tasks the integrator has to do to move from now to having Wapping in production.
If not read, check the About Wapping article, as it provides usefull information about the platform.
The typical onboarding scenario moves in two planes, business and technical. Both planes are independent and will progress in paralell.
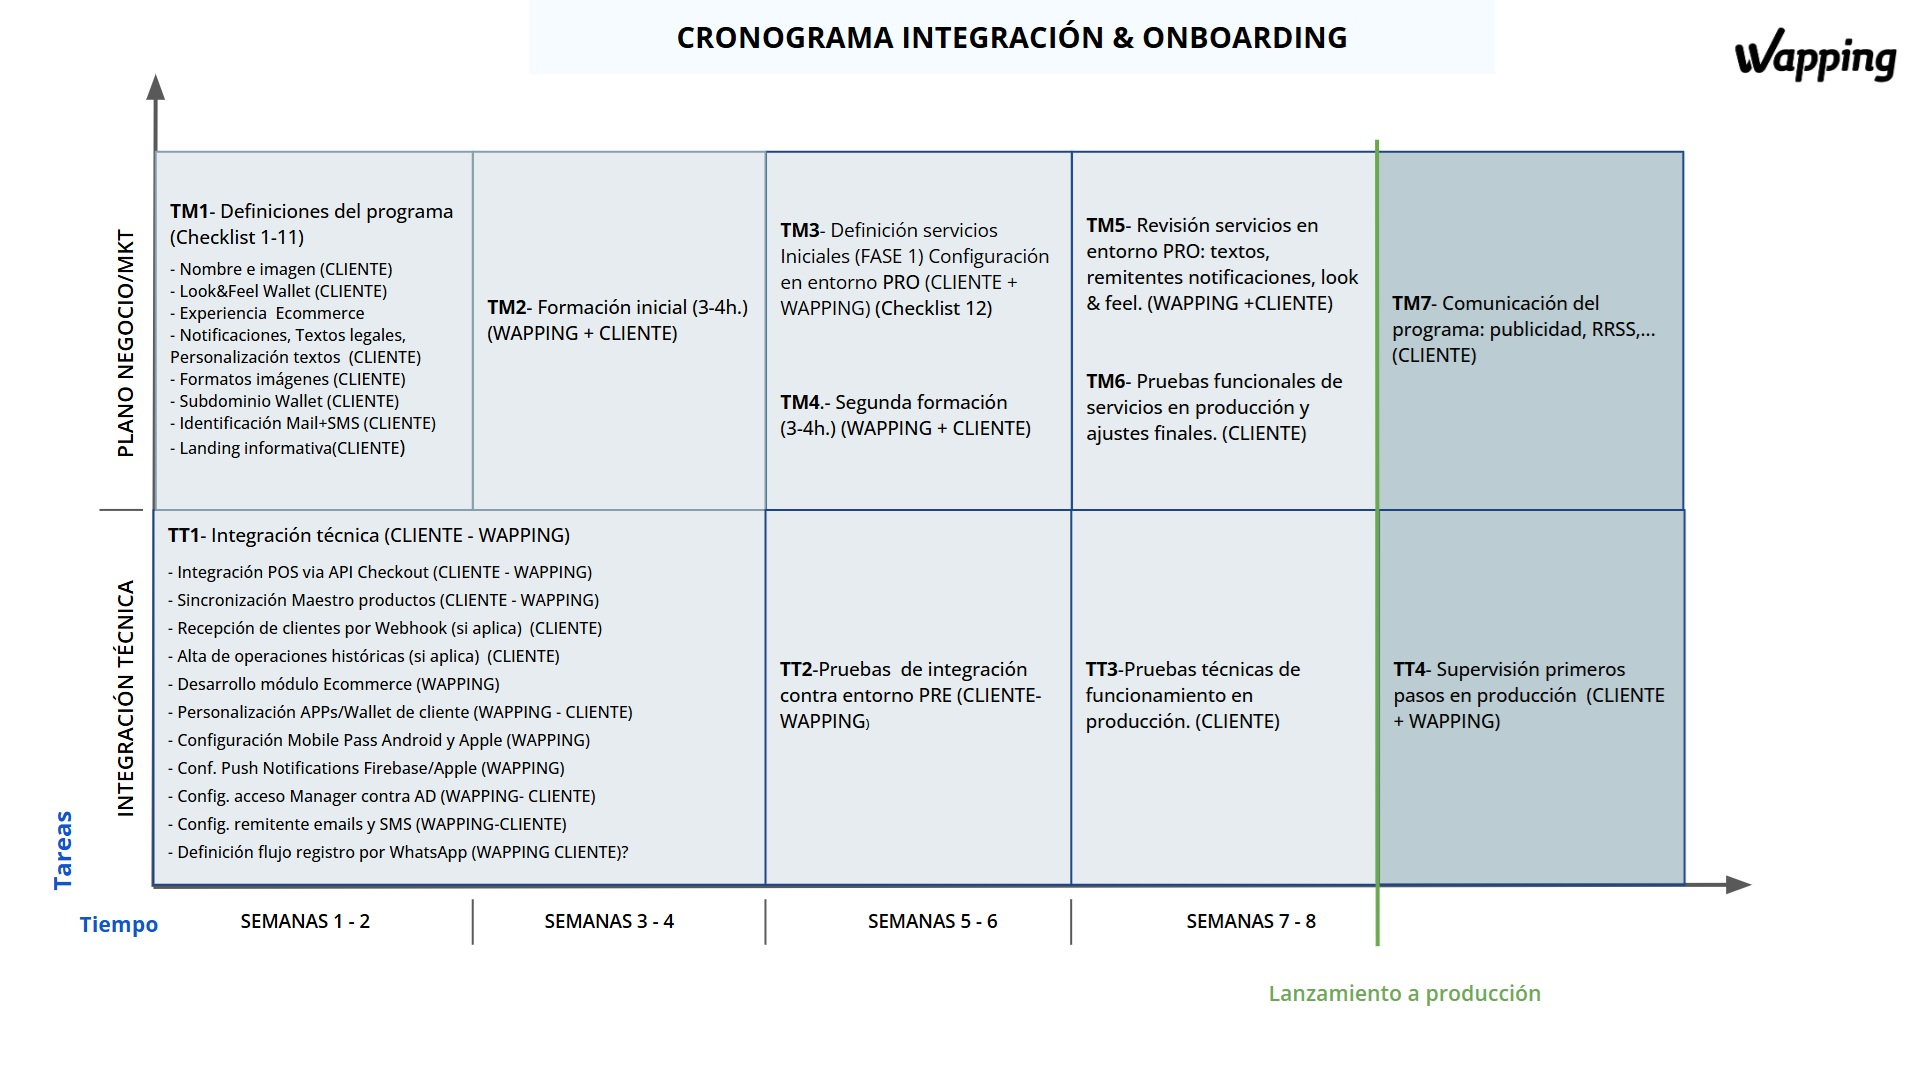
The cronogram is show as an example, real cases may slightly vary
This guide will cover the technical plane where a deeper focus on the parts involved in the onboarding and integration with the platform will be made.
Integration parts
The onboarding usually has three parts that can move in paralell
All the all technical tasks involving an onboarding, wich are not part of the integration itself.
Enabling external communication channels used to interact with your customers
API integrations to support the POS and Ecommerce trough Checkout API, product sync and more
The technical checklist has tasks regarding the setup of several systems, necessary to operate with the Wapping platform. As it will be shown, the platform covers a wide range of functionality and as so it has to be provisioned with different systems like mobile app accounts, AD connection, etc.
The second part refers to the communication channels, here it will be shown how to configure the different channels to reach your customers (SMS, mail, whatsapp and push notifications) and to make full use of the capabilities of the platform. This will involve choosing naming, configuring DNS or creating certificates so Wapping can send the configured notifications through each channel.
Lastly and more importantly, the integration will have to be considered. It's important to understand that this is the main part of the onboarding process, sometimes requiring up to 80% of the total time and effort, it's crucial to plan the priorities according to this.
The integration will be explained in detail, it can vary depending on the scenario, the documentation and the meeting with Wapping onboarding team will clarify the path to follow.
Tools
Wapping provides a range of tools to help the developer team integrate all the parts of the platform.
- Integration environment: A complete provisioned environment will be provided at the start of the process to allow the dev team to understand, implement and test the integration
- Manager access: The control center of the platform, mainly used by marketing and business teams to define the strategy, but crucial for the developer team as it will allow to visualize and check the status of the integration.
- Simulator: POS simulator already connected with Wapping, with functionality to view the calls to the APIs in real time as the user interacts and completes the operations.
The simulator can be downloaded here, the credentials will be needed to connect to the respective environments.
Updated 7 months ago