
Iframe Integration
A direct and easy way to integrate the customer wallet in any authenticated medium like an ecommerce
With the integrated ecommerce (Salesforce, Shopify, Prestashop, VTEX, Adobe Commerce) this integration is not needed as it's already included and provided by Wapping.
To display the customer's Wallet within an external system, such as an Ecommerce platform, the fastest and most hands-off method is to embed it using an iFrame. This approach can go from the easiest as a plug and play in the main Ecommerce platforms (Salesforce, Shopify, Prestashop, VTEX, Adobe Commerce) to just calling the Identity API to register a customer identity and load an iframe with some specific parameters.
*Bear in mind that when using the integration module provided by Wapping for the 5 aforementioned ecommerce, this integration won't be needed as this is already implemented and plug and play.
In a different or custom ecommerce this integration will be needed.
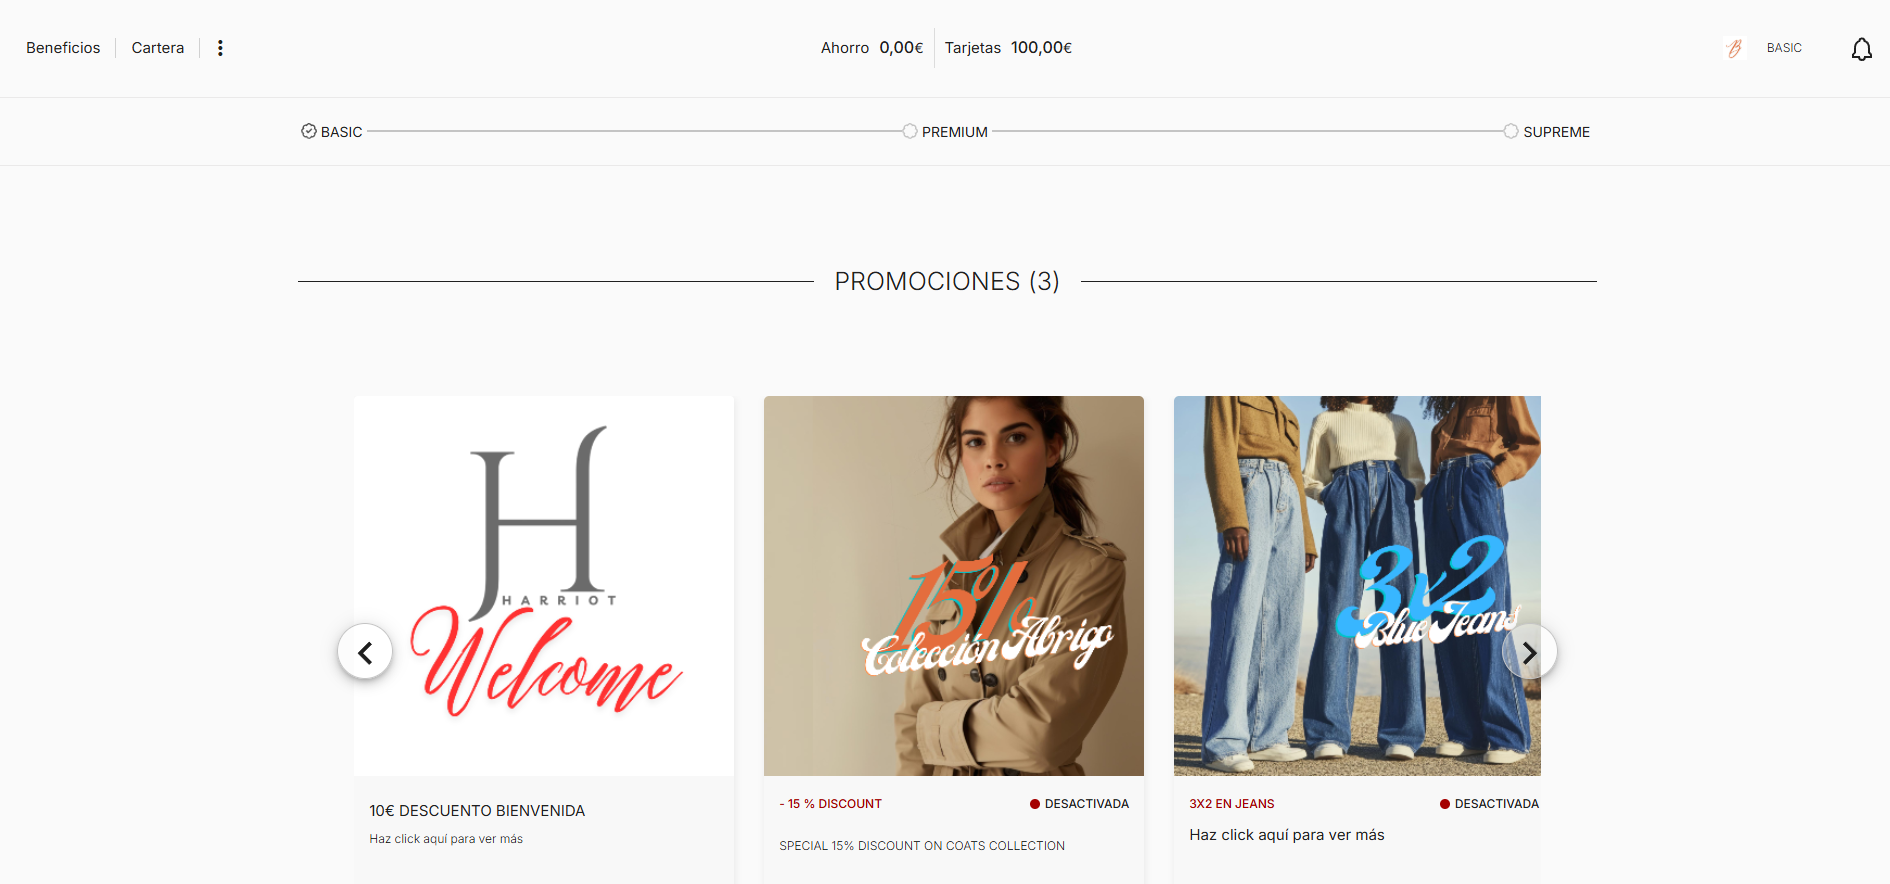
The customer wallet handles requests, customer login and registration, and the linking of customer accounts with Wapping.
Authentication works using the customer ID from the eCommerce or external system.
If a customer is already registered in Wapping and their account is linked with the eCommerce user, their Wallet will be loaded directly, and they won’t need to log in every time.
If the user is not linked, an assistant will be displayed to help them create or link their Wapping account.
URL Formatting
For the system to work, the URL the iFrame points to must contain a set of parameters and must also be signed with the eCommerce API key using HMAC.
The URL format is as follows:
<endpoint>?b=<businessId>&s=<thirdPartySystemId>&cid=<thirdPartyId>&t=<timestamp>&hmac=<hmacSignature>
A real example:
https://harriot-essence-club.b2w.app?b=3&s=1&cid=rfj8y6xs89dbxl&t=637637551066710000&hmac=123d6d84cc95cdb2ac8e9889ca6be1ec2ec8faeca9c0e3a3acbc0ca39a42ee85
Parameters:
- b: Business ID in Wapping.
- s: External system ID in Wapping. Indicates which system is being used to log in (e.g., Salesforce, Shopify, etc.).
- sc: (Optional) External custom system created in Wapping if system parameter = 3.
- cid: Customer ID in the external system, the one used by the corresponding eCommerce.
- cmp: (Optional) Phone number of customer, to jump the first step that asks the phone to customer.
- t: Timestamp in Microsoft ticks (explained below).
- hmac: Signature
The optional parameters that are not sent must not be included in the query, and not sent empty.
To obtain the necessary parameters to integrate the iframe, you must consult the Manager.
eCommerce key: Provided by Wapping
IMPORTANT: This key must remain secret and should always reside on the server.
Business ID: Business identifier provided by Wapping.
eCommerce type: Numeric ID identifying the type of eCommerce.
Endpoint: Base URL of the client's web page.
| External Id Type | Id |
|---|---|
| Shopify | 1 |
| Salesforce | 2 |
| Custom | 3 |
| Prestashop | 4 |
| Mobile | 5 |
| 6 | |
| Waitry | 7 |
| VTex | 8 |
| Magento | 9 |
HMAC
After composing the URL with the parameters above, the next step is to sign the URL. This is done using HMAC, with the business's eCommerce key. This allows Wapping to identify requests coming from the client.
Any method to generate an HMAC signature can be used. The code includes an example using the JavaScript library jsSHA.
Essentially, you take the query string (queryString in the code) and generate the hash. Then, compose the final URL by appending the result:
To verify that the HMAC is being correctly generated, you can use online tools like this one.
On the example:
https://harriot-essence-club.b2w.app?b=3&s=1&cid=rfj8y6xs89dbxl&t=637
We see the query:
b=3&s=1&cid=rfj8y6xs89dbxl&t=637637551066710000
This would be signed with the key:
FCE131FC-F404-455D-BDD0-D10B0F38C45B
So the resulting HMAC would be:
6dd0d3edc2aa13d02eb6a0e2565a279b53274b8ad3c2ae6ad85dca97ccaed78b
Calculate Microsoft Ticks
To calculate the timestamp an example code is shown below
const epochTicks = 621355968000000000;
const ticksPerMillisecond = 10000;
//Calculate ticks of current date in Microsoft Standard
var date = new Date();
var yourTicks = epochTicks + (date.getTime() * ticksPerMillisecond);
Iframe sizing
The iframe has a message mechanism to define the height of the container in each screen. This is done to ensure the optimal UX using it and to prevent double scroll bars.
To use it, an eventListener has to be defined to process the message. This message will inform the iframe of a couple of usefull events like the session-expired, or a modal has been opened, plus the standard one in which the required height of the container will be provided.
An example is defined to see one way of implementing the listener
async function iframeResize(message) {
    try{

        if (message.origin != endpoint) {
            return;
        }

        if(message.data == "session-expired"){
            window.parent.location.href = window.parent.location.href;
        }
        else if(message.data == "modal-open"){
            window.scrollTo(0,0);
            window.onscroll = function() {
                window.scrollTo(0, 0);
            };
            await new Promise(r => setTimeout(r, 200));
            window.onscroll = function() {};

        }
        else
        {
            document.getElementById('wapping-container').style.height = message.data + "px";
            window.scrollTo(0,0);
        }

    } catch (e) { }
}

window.addEventListener('message', function (e) {
    iframeResize(e);
});
Updated 10 months ago